Foxit and PDF Accessibility
Accessible Forms in PhantomPDF
This article refers to an outdated version of this product and is maintained here for archival purposes.
Overview
Compared to HTML, PDF forms have some inherent accessibility limitations. There is no real way to associate the visible text label with the form field, but there is a way to provide a text description that will be read to a screen reader while navigating through the PDF. In addition to the accessibility principles outlined in the previous page of this article, the following four steps are required to ensure the accessibility of a PDF form:
- Add the correct form fields to the PDF.
- Include an accessible label that describes the purpose of the form control to a screen reader. This is provided through the Tooltip.
- Add tags to the form fields.
- Check (and if necessary, repair) the tab order.
1. Add Form Fields
Most PDF forms start out as Microsoft Word files or other electronic documents with spaces for form fields. Actual form fields must be added within PhantomPDF Professional before the file can be filled out electronically.
Add form fields automatically
With most files, the easiest way to add form fields is to have PhantomPDF detect and label these fields automatically. Go to the tab and select .
Form fields can sometimes be incorrectly added to the PDF. This is especially common for cells within a data table or lines that are used to separate page sections. To remove a form control, Open the panel in the left sidebar (the second icon from the bottom).
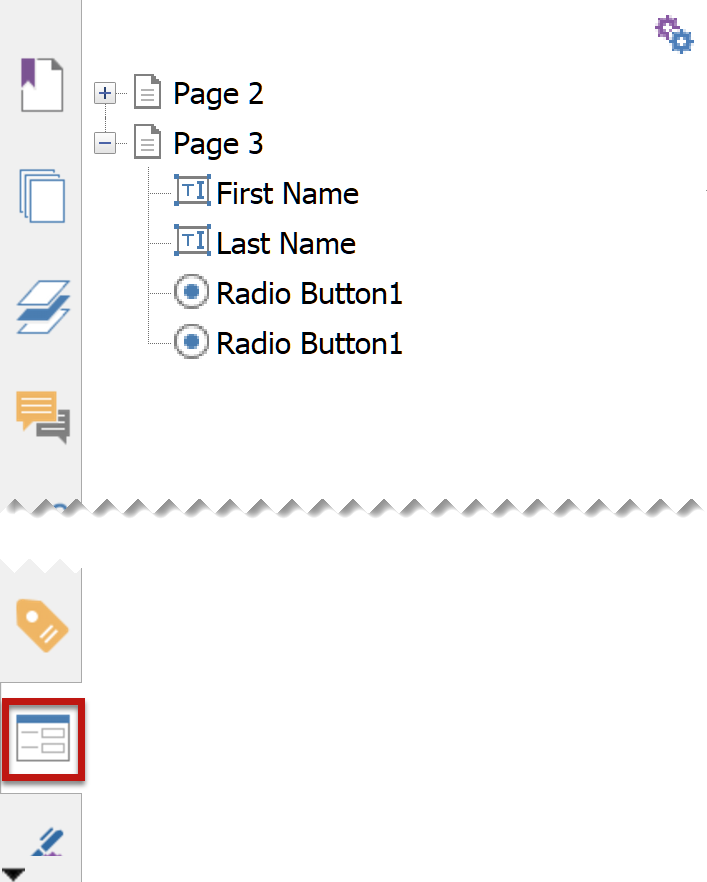
Then, select the incorrect form field from the tree menu, and press Delete.
Add form fields manually
To add a form control manually, open the tab and click on the desired form field type in the toolbar above your PDF.
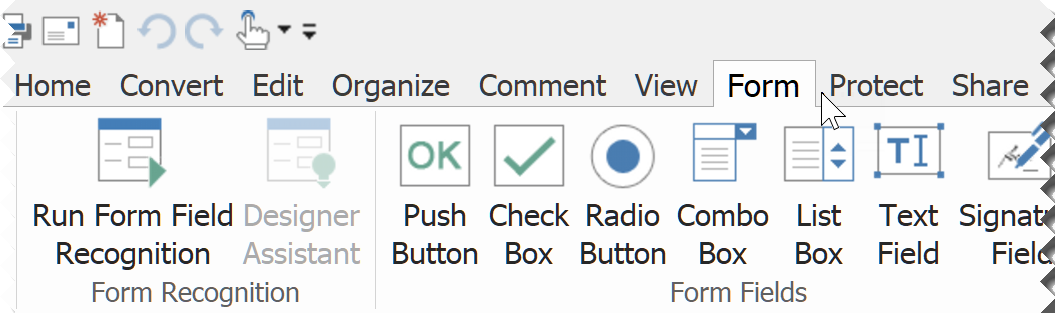
Then use your mouse to draw a box that will contain the form control. Ensure the new form field covers the existing space (e.g., a new radio button should cover the circle that already appears on the page).
PhantomPDF will prompt you to add a field name. A descriptive name will probably be helpful when reviewing the form data later, but the name will not be read by a screen reader.
2. Ensure Every Form Field Has a Descriptive Tooltip
When a screen reader user navigates to a form field, its contents must be described to a screen reader user. This descriptive text is typically called a "label" because the <label> tag is the main way to accomplish this in a webpage. In a PDF, this information is provided through the Tooltip.
Review or repair the Tooltip
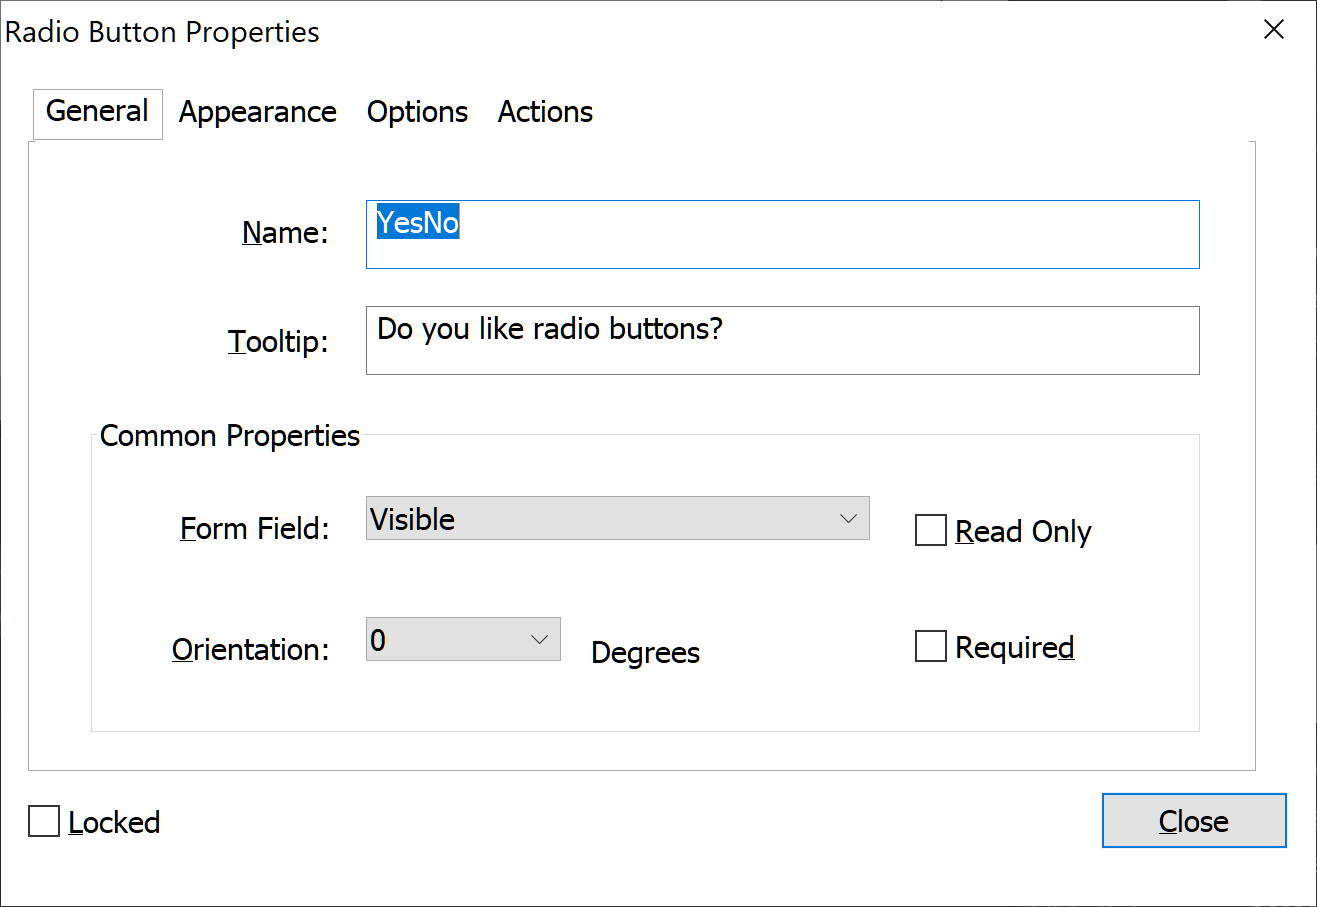
When PhantomPDF adds form fields automatically, it also automatically adds a Name and Tooltip to each field based on text near the field. However, you should still review each Tooltip. If you added the fields manually, the Tooltip will be blank. To add a Tooltip, make sure the panel is selected, a form field and choose . Make sure the conveys all the information a screen reader needs to correctly complete the field, and correct it if it does not.
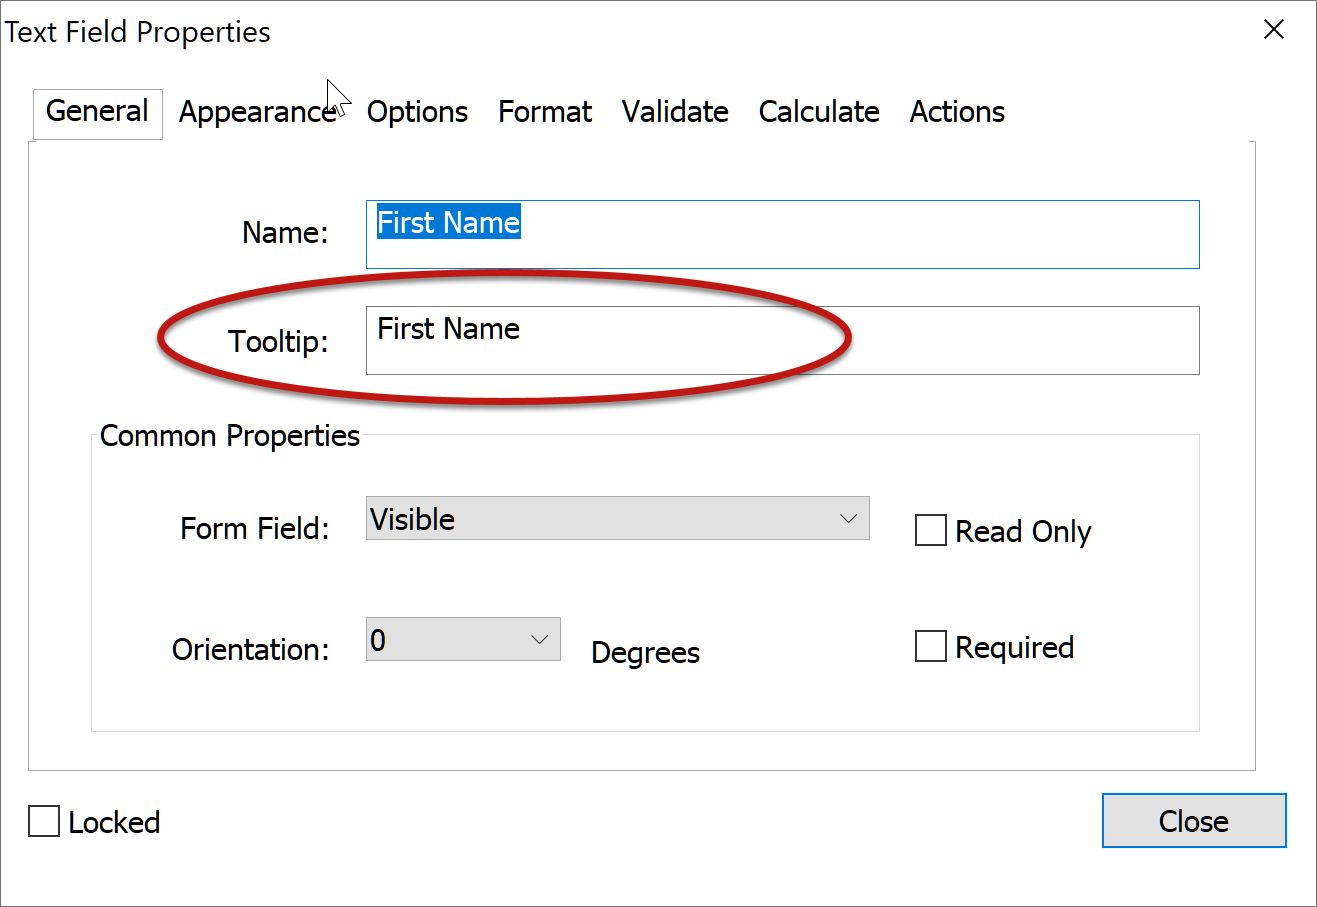
If you are checking multiple Tooltip values, leave the Properties window open in an empty part of the screen and click on each form field.
Fields that are marked "Required" are not identified as required by a screen reader. Add the word "required" to the Tooltip.
Form field types
The following section provides additional details for specific types of form fields.
Text field
In most forms, the most common field type is a text field. There are options to make this single or multi-line.
Dropdown list
These menus can be navigated with the arrow keys or by selecting the first letter of the desired option. If an option is selected by default, it will be read by a screen reader in addition to the Tooltip.
List box
A list box looks like an expanded dropdown list and allows the user to select multiple options by holding down the Shift or Control key while selecting an option with a mouse. List boxes introduce accessibility issues for keyboard users and usability issues for everyone. Use a group of checkboxes instead.
Radio buttons
Radio buttons (a group of options where only one option can be selected) require additional information to ensure accessibility. The following information must be provided in the dialog:
- The must be the same for every radio button within the group. This groups the options together and allows a keyboard user to select an option within the group using the arrow keys.
- The value should also be the same for every radio button in the group. This provides a shared label for each of the options, like the
<fieldset>and<legend>elements in HTML. Because this information will be read for each option in the group, it should be succinct.
- Under the tab, the must match the text that appears next to each radio button.
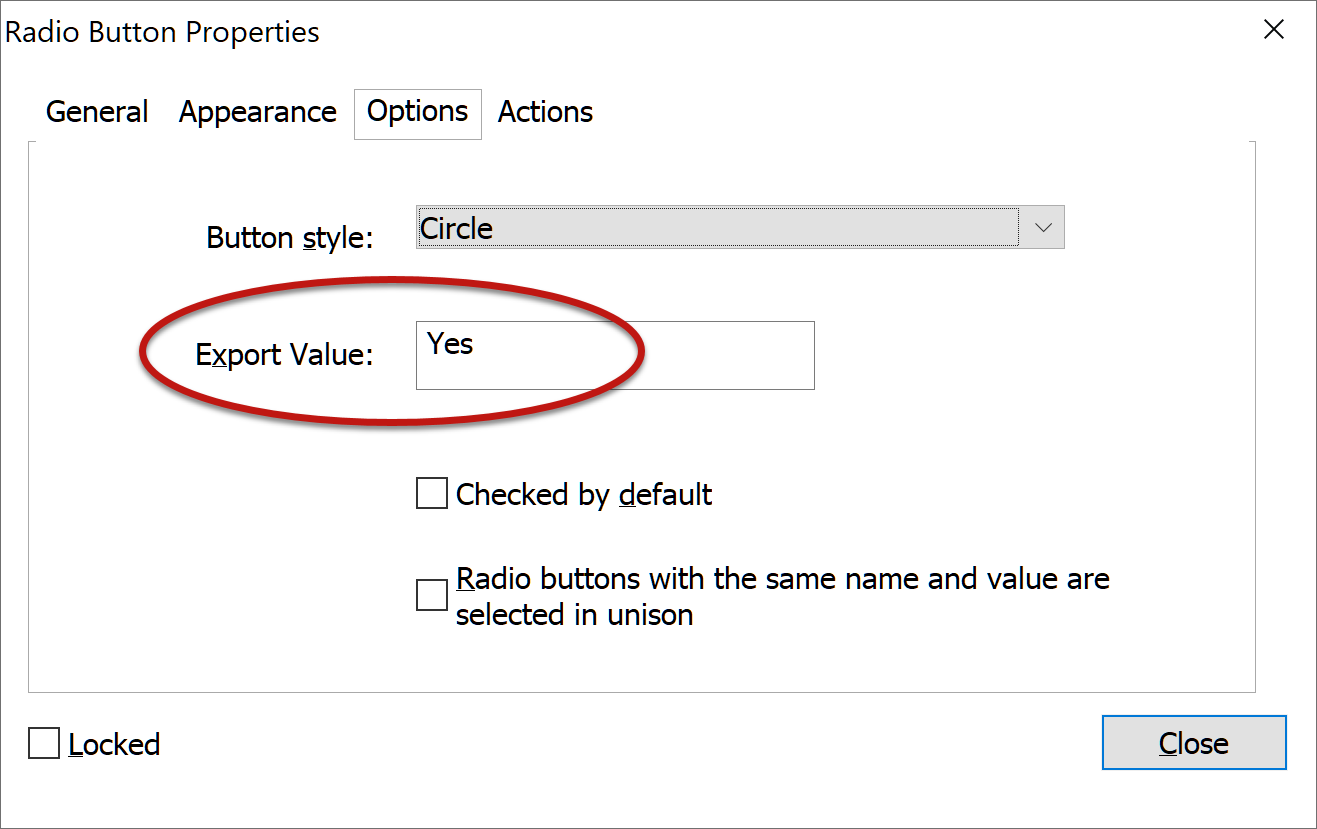
If this information is presented correctly, both the and will be read to a screen reader.
Checkbox
Unfortunately, checkboxes cannot be grouped together in the same way as radio buttons. This means that the description of the group of checkboxes (if present) and the description of the checkbox itself should be defined in the .
These principles for radio buttons and checkboxes must be balanced with the need for a succinct Tooltip. For example, descriptive text that is merely informative (e.g., "Check all that apply") should probably not be added to each Tooltip. A Tooltip that is extremely long could possibly be added to the first checkbox or radio button with a more succinct Tooltip added to other options. Use your best judgment.
Button
To add text to a button, open the dialog for the button, select the tab, and then enter the appropriate text in the option. If a button does not have a Tooltip, the text that appears on the button will be read by a screen reader, but if a Tooltip is provided it will override the button text. While adding a Tooltip to a button does not appear to be necessary, the accessibility checker will flag a button without a Tooltip as an error, so it may be best to provide a Tooltip for the button that is identical to the button text.
3. Add Tags to Form Fields
Follow these steps to add correctly-ordered tags to a form:
- Select the button in the upper-right corner of the screen.
- Open the tab and choose the option.
- Open the tool. Ensure the radio button is selected and uncheck .
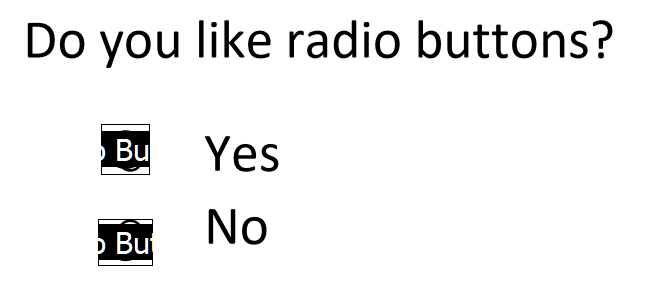
- Check to see if each text label is in its own box. For example, these "Yes" and "No" labels are in a single box, meaning they also share a single tag.
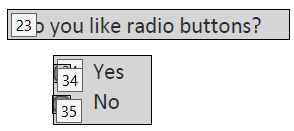
If this occurs, drag a box around each label and press the button to put it in its own<P>tag. This would also be a good time to fix any other tagging issues with your PDF. - Select the button and repair the reading order.
- Confirm the reading order is correct in the panel and repair if necessary.
- Once the reading order of the entire document is correct, select from the tab and ensure there are no issues related to forms. If appears, that means there are still untagged fields. You will need to repeat the above process. If appears, click on the error to see where the issue occurs, and repeat the process for adding a descriptive Tooltip.
4. Check and Repair the Tab Order
Once the form fields are labeled correctly, and the structure order has been corrected, the keyboard navigation order of the form fields should be correct. But it is still a good idea to double-check this, especially if you are relatively new to forms in PDFs. The easiest and most accurate way to test the keyboard navigation order is to save and re-open, and then use the Tab key to navigate the form.
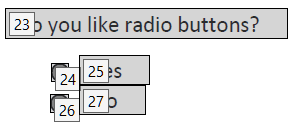
Another option is to review the tab order within PhantomPDF. Open the Manage form fields panel and select the Set Order option in the upper-right corner of the panel. Make sure Order tabs by structure is checked (it should be by default), and check Show tab numbers.
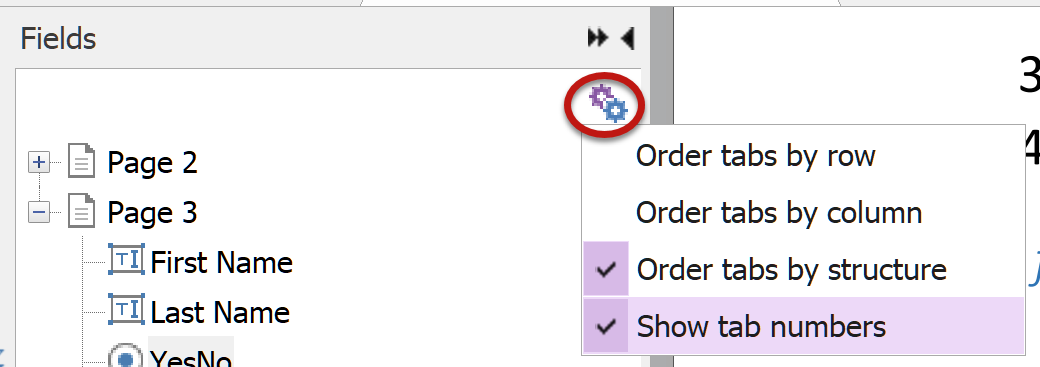
Numbers will appear within each form field outlining the tab order. If these numbers do not match the visual reading order, return to the Reading Order tool and Tags Panel and confirm that order is logical.
Other Principles
- When a screen reader enters a form, it usually switches to a different reading mode, often called "forms mode." While in forms mode, the screen reader skips over content that is not a form control or link. For this reason, it is best to place important information or instructions that apply to the whole form before the first form field when possible.
- Form error messages (e.g., an email field does not include an email address) are presented in a popup dialog. This dialog is accessible to screen reader users. If these are being used, ensure the error message provides the information that a user needs to find and fix the error.
- Not every PDF form requires a button for submission. Many forms are designed to be filled out online and then printed and submitted in person or by mail.