Word 365 and 2019 for Windows
Creating Accessible Documents
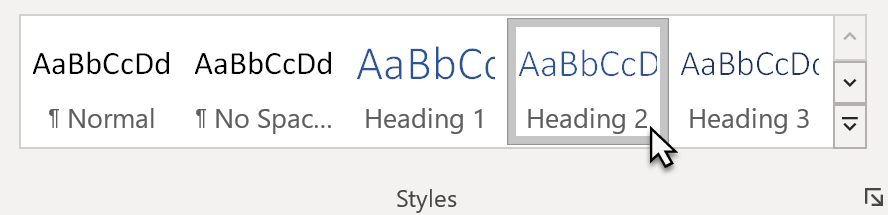
Creating and Editing Headings
- Select the tab from the ribbon.
- In your document, select the text to convert to a heading.
- Click on the appropriate heading level in the in-ribbon gallery, e.g., .
- Headings 1, 2, or 3 can also be assigned using Control + Alt + 1, 2, or 3, respectively.
Word documents with a true heading structure provide at least two benefits:
- The document retains this structure when correctly exported to HTML or PDF.
- The document's readability is increased for all users.
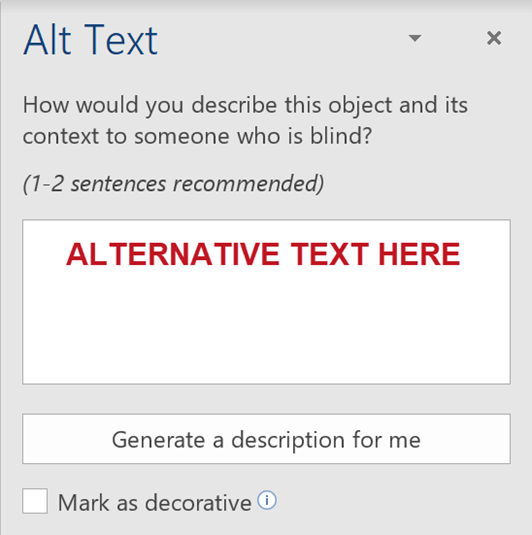
Adding Alternative Text
on the image and select , then enter appropriate alternative text in the field that appears in the sidebar.
If the image is decorative, leave the field blank and check .
Do not select the "Generate a description for me" button. The quality of the automatically-generated descriptions is usually very poor, and a description of an image is often not the same as alternative text.
Adding Table Headers
- Click inside the table. The options should become visible, and the tab should be open.
- If the top row of the table contains headers for each column (most tables do), make sure the checkbox is checked.
- If the first column of the table contains headers for each row, check the checkbox.
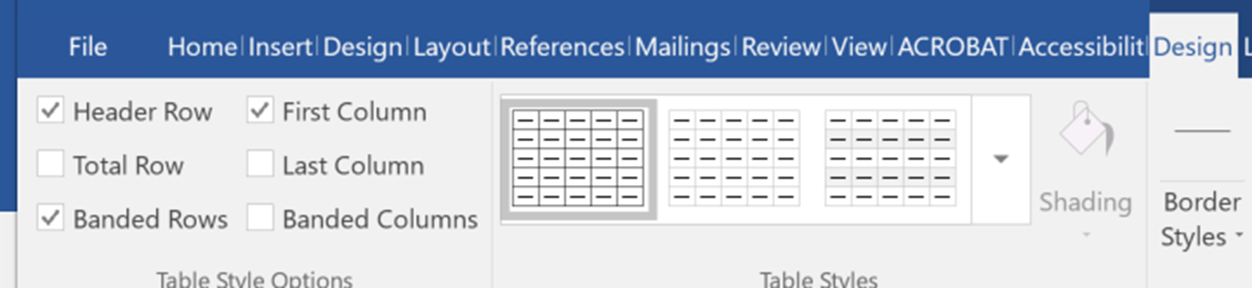
In the section, select a style where the table headers are clearly identified visually. Make sure the style has good contrast.
Most screen readers will not identify table headers in Word, but we still recommend going through this process. It is important to identify headers visually, and support for table headers in Microsoft Office is improving constantly. Plus, these headers will be identified when saving to PDF.
Editing Links
To change the link text:
- the link and select . A dialog will appear.
- Click in the field at the top of the dialog and enter descriptive link text.
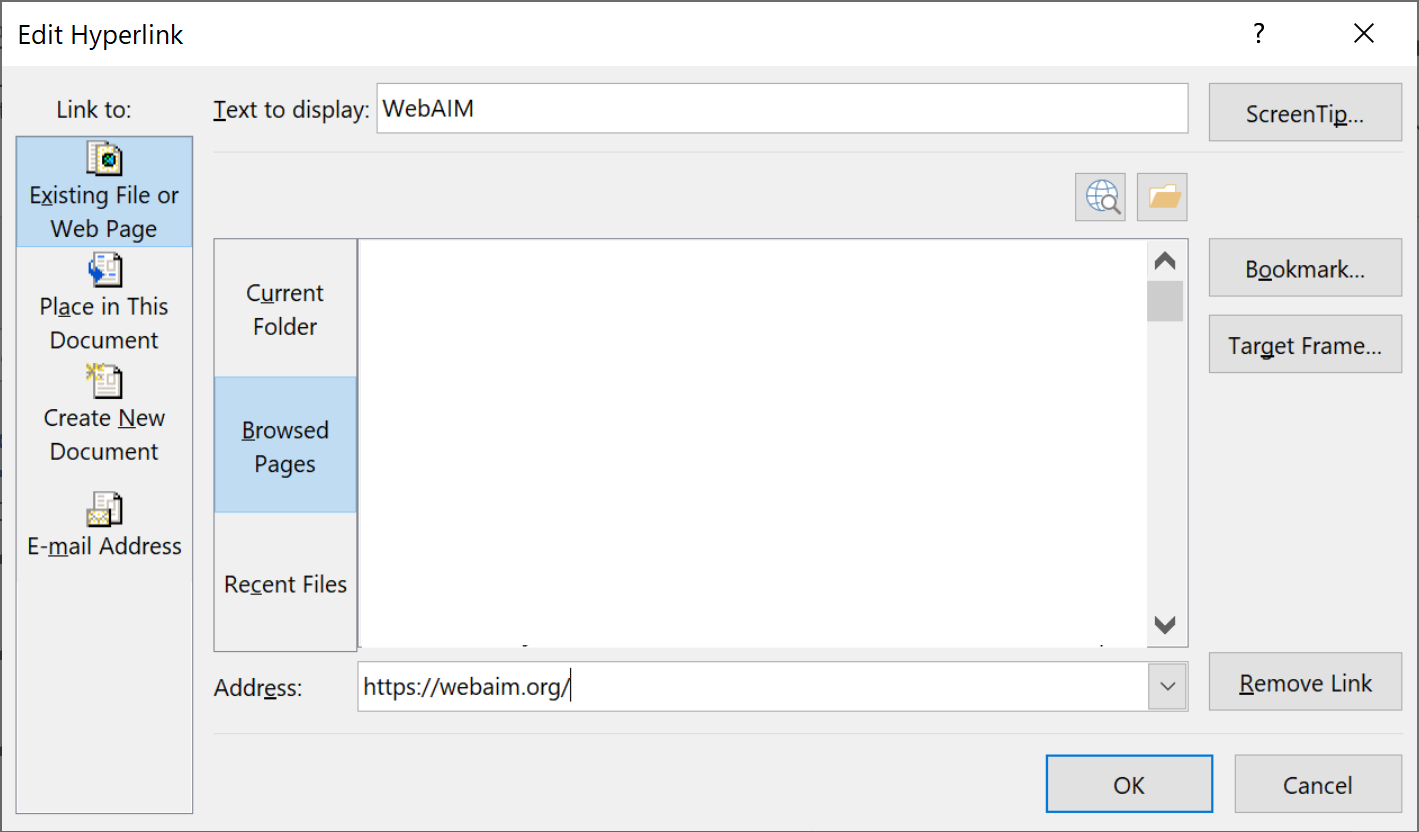
If you are creating a presentation that is intended to be displayed both electronically and in a print, you may want to include the URL and a description in the link text. For example, "WebAIM Introduction to Web Accessibility (webaim.org/intro)."
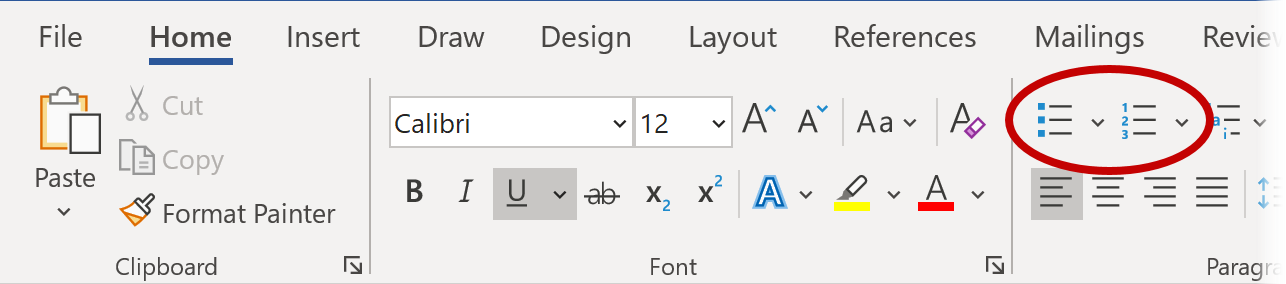
Creating Lists
- Select the tab on the ribbon.
- Choose the or option from the group.
Creating Columns
- Select the tab on the ribbon.
- Select in the group.
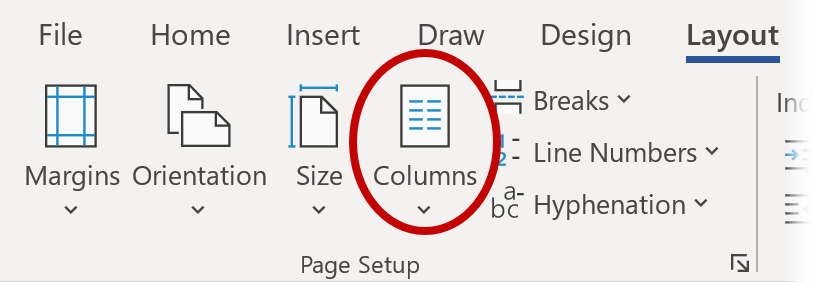
- Choose the number of columns.
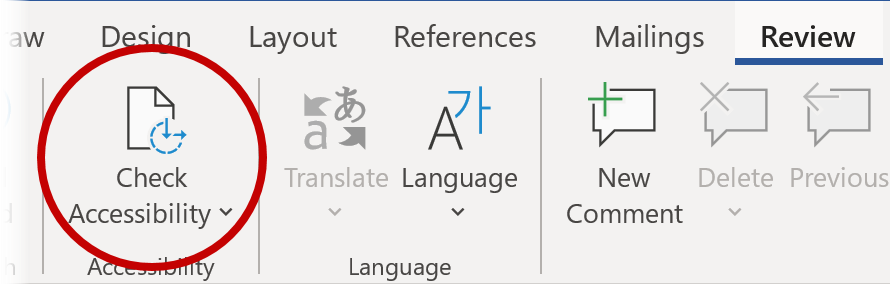
Using the Accessibility Checker
To start the Accessibility Checker, select the tab, then choose .
The sidebar will appear to the right. The checker presents accessibility errors (e.g., images with no alternative text) and warnings (e.g., Hard-to-read text contrast). Selecting an item in the report will highlight the issue within the slide. Information about the issue, and instructions on how to repair it, will also appear at the bottom of the sidebar.
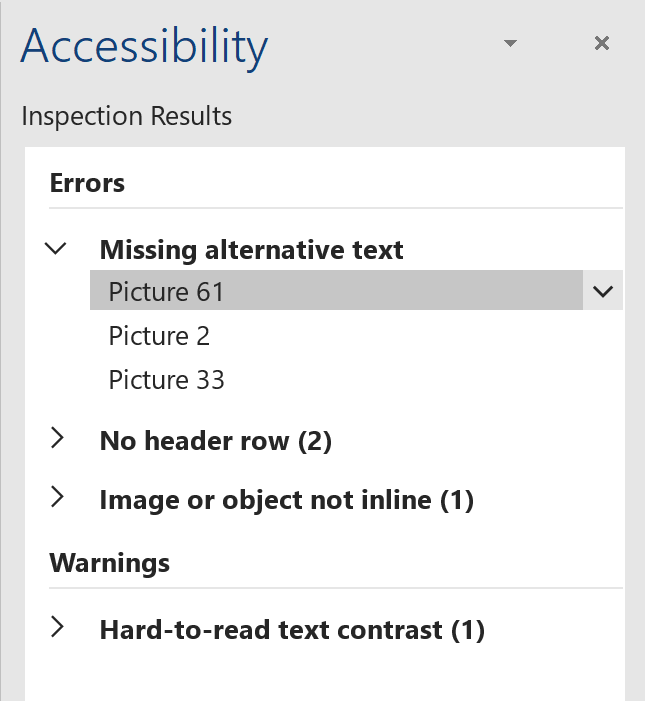
When the issue is addressed, it will disappear from the report automatically.